
The Car…
Audi A7 Quattro TFSI 3L Supercharged
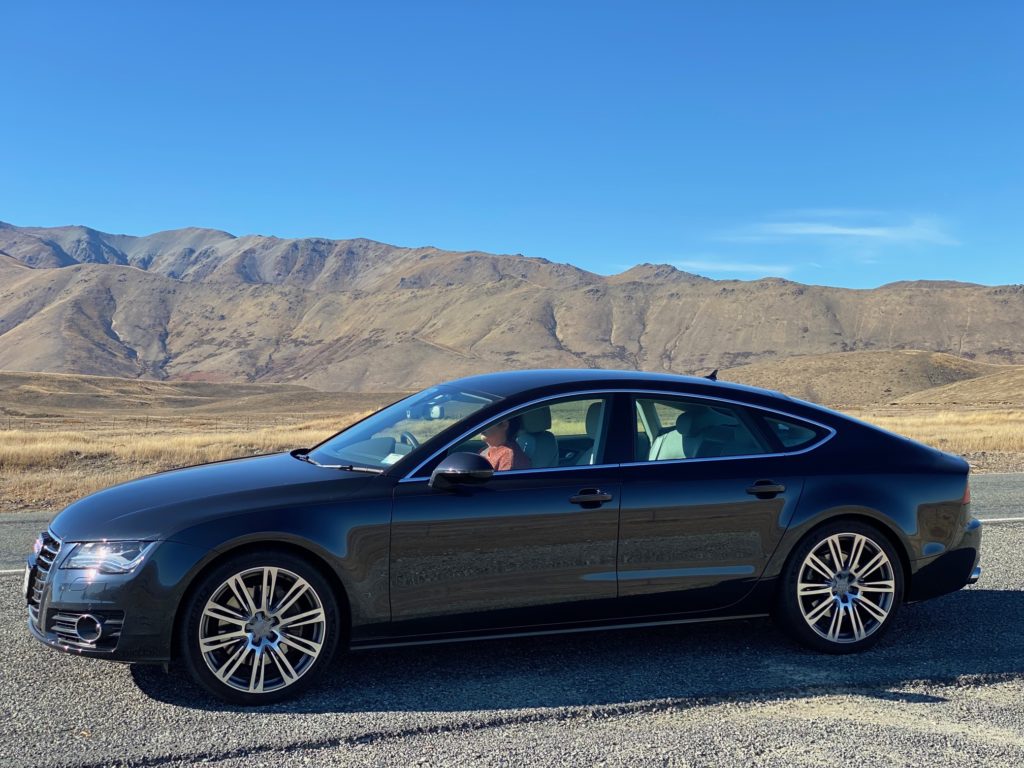
This is my car. I took the picture above on a tour of the South Island not long after it was purchased from the car dealer. It’s a 2012 model, so it’s getting a bit old now, but it doesn’t feel like it because it had low mileage. It’s fast—over 300 HP stock—it’s a 3L supercharged, four-wheel-drive vehicle, and it has all the mod cons inside, including Apple CarPlay, heated seats, adaptive cruise control, and many more options. It feels really nice to drive.
Brand new, the car comes with three options for the audio system: the standard one, the Bose audio system, and the B&O audio system. Mine has the Bose system, which includes the Bose DSP Amp and 14 speakers—including a subwoofer in the boot.
The Problem
Personally, I didn’t really rate the Bose system—there is a significant lack of bass, and it feels like the frequencies are not all that full range. Bose does have a reputation of no highs and no lows, which is pretty much what I was experiencing. After one of the front woofer speakers developed an annoying buzz at some frequencies, I decided to replace them. After that, I got a bit carried away and decided I’d replace the whole lot, including the amps.
The Project
Requirements
- The existing tone/fade/balance controls should still work.
- I don’t want to cut factory cabling. I will use existing wiring to speakers.
- Keep boot area as clear as possible.
Scope
Replace all speakers and new amps (via line output converters) plus add subwoofer enclosure.
Future Backlog
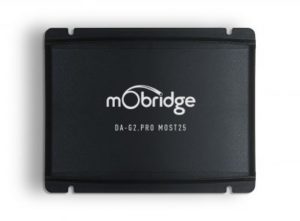
Replace the factory amp with a Mobridge Pre-amp / DSP.
The Parts
I started by researching what speakers would be suitable. I used a couple of sites which allow you to select your car, and it shows you what speakers are available for the various positions. The sites I used:
Front Woofer and Tweeters
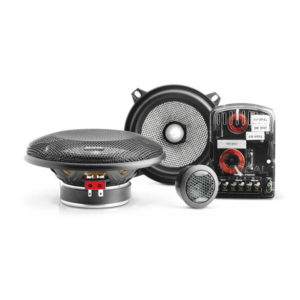
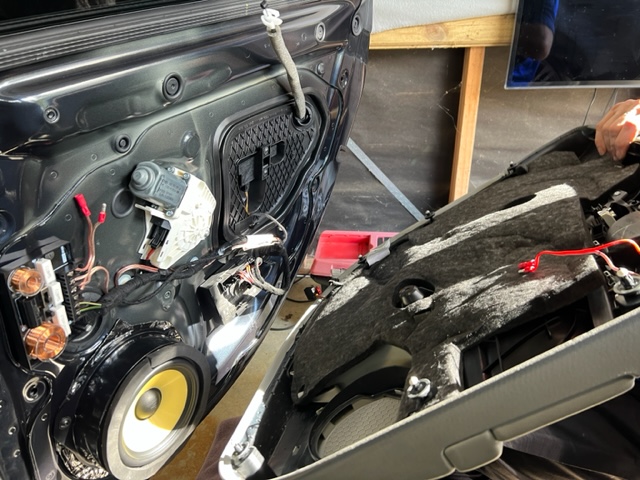
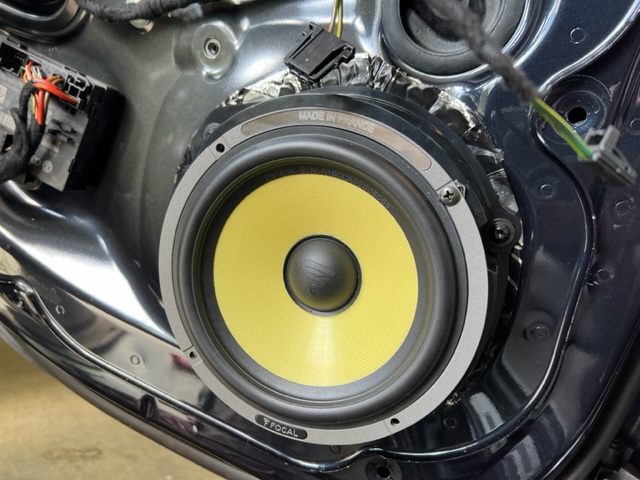
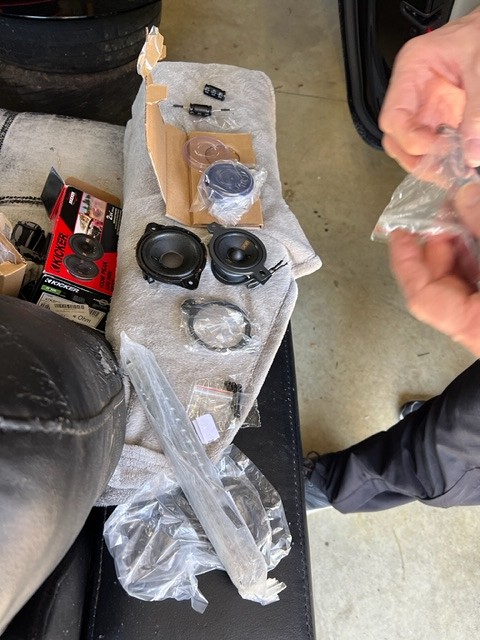
I like Focal speakers, and so I bought the Focal 130AS 5.25″ component speaker package for the front woofer and tweeters initially (as one of the woofers was blown) from Jonvy auto accessories and got them to install it. That took care of the initial problem, so then I started to build up the parts list for the rest of the system.
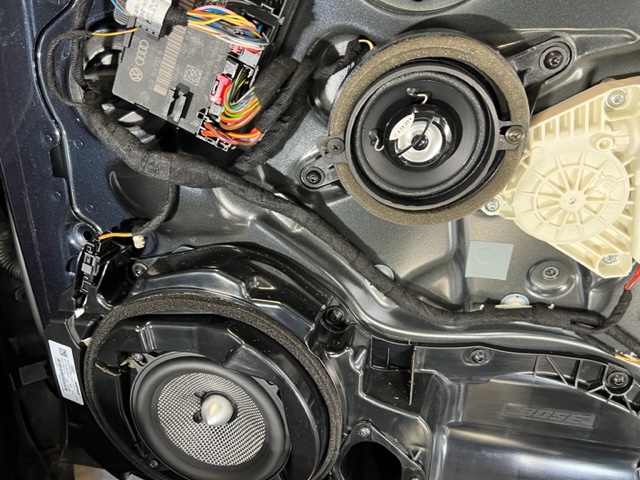
Rear Woofer and Tweeters
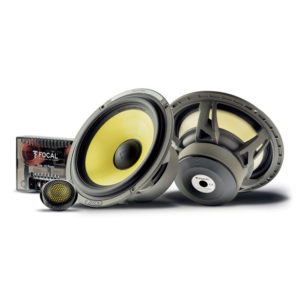
I splurged out a bit for this, as the speakers had quite a bit of a discount at a local audio place—Driving Sound—a bit more than I was going to spend, but I bought them anyway. The Focal ES165K 2-way 6.5″ component package. I also purchased a spacer for them from Sonic Electronics.
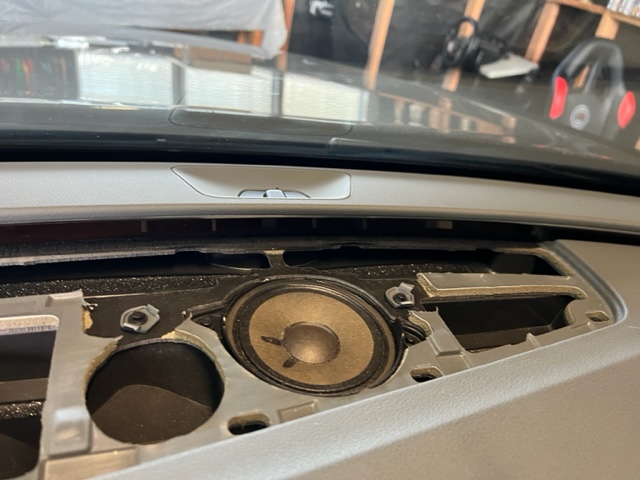
Centre and Front Midrange
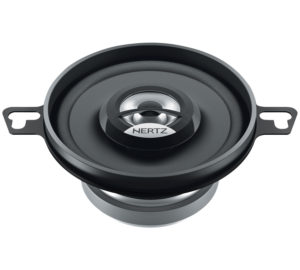
I read some great reviews on the Hertz DCX87.9 3.5″ speakers, so I got some of them. They proved a bit hard to track down in NZ, but eventually I found them on the Harvey Normans website online only—they shipped from Australia. I bought two sets (they come in pairs), so I now have an orphan speaker—I’ll find a use for it on some random project.
Rear Surrounds

These speakers were a bit tricky to find as they are an odd size—2.75″—but find them I did. The Kicker 47KSC2704 did the trick. I had to buy them from Amazon as no one had them locally.
Subwoofers
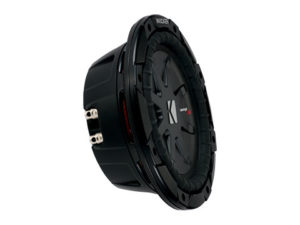
The stock subwoofer was really poor. The magnet was so small that it really was a bit of a waste of time, so I removed it from the enclosure and replaced it with a Kicker CompRT 8″ subwoofer. I had to use a heat gun to melt the enclosure a bit so that it would fit the larger magnet, but I got there in the end. I also added some polyfill inside, which I’d read was useful for smaller enclosures.
I had my doubts that this single 8″ sub was going to do the job, so I got an external loaded enclosure which uses the same speaker.
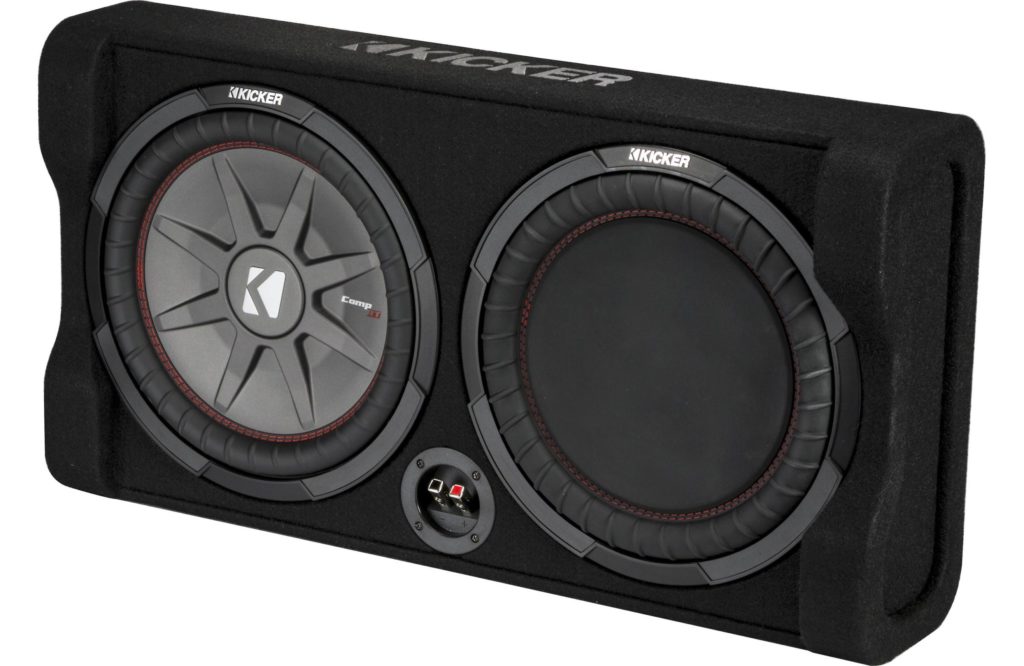
It sits flat in the boot and fires downward, taking up less space, as you can put stuff on top of it if you really need to.
The speaker-looking thing on the right is actually a radiator—it acts a bit like a bass port, but better.
Both of these speakers are 2 ohm, which is important because I planned to run them both in series to present a 4 ohm load to the amp.
The Amps and Line Out Converters (LOCs)
You can’t easily replace the factory amp. Audi—as do a lot of modern cars—have all kinds of CANBUS connectivity and integrate with the car systems to such an extent that it’s difficult (but not impossible—Mobridge has a solution) to replace.
So I wanted to take the speaker outputs from the factory Bose amp and feed those signals into aftermarket amps using line out converters where needed.
The McIntosh MC440
I stumbled upon a highly rated vintage 6-channel audiophile car amp that I absolutely had to have! The thing goes for serious money on eBay, around 2.5k, and one came up on Trademe for $800. It wasn’t in perfect condition, but I took a gamble on it.
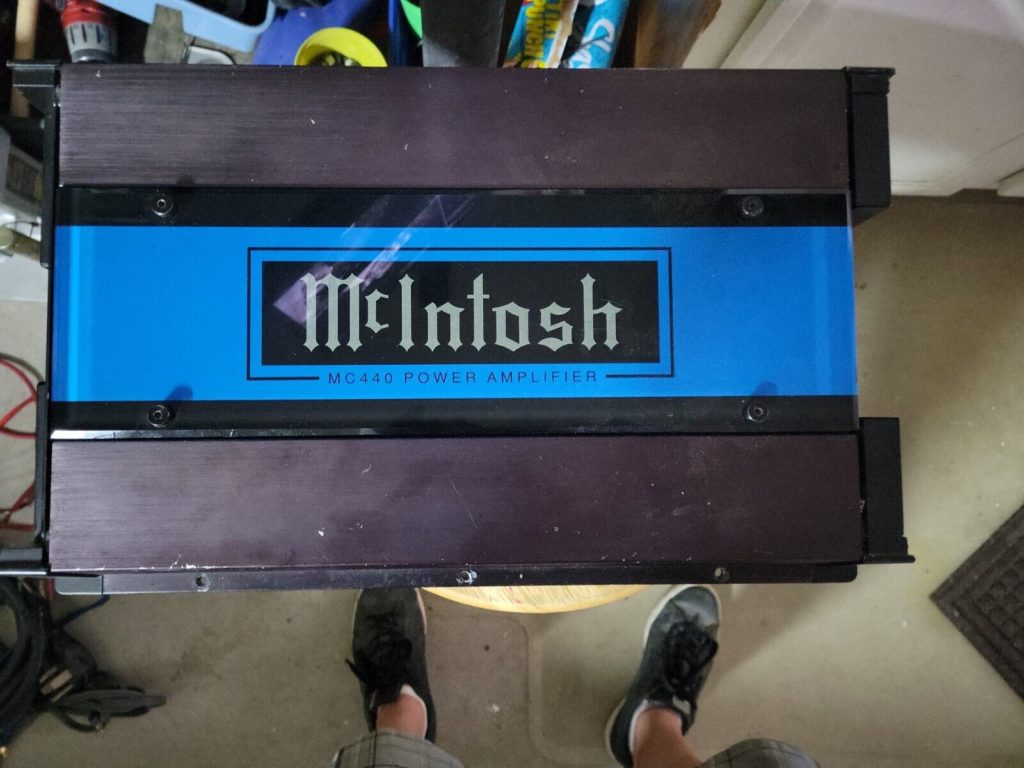
It’s a pretty neat amp, Class AB, rated for 4 x 50W and 2 x 100W. Although after some testing, I realized that one of the channels had a fault, but I was still able to use it as a 5-channel amp. I managed to find the manual online. The sound it gives out is pretty impressive, very clear, with low distortion. The inputs for this amp range up to 3V, so I needed a line out converter.
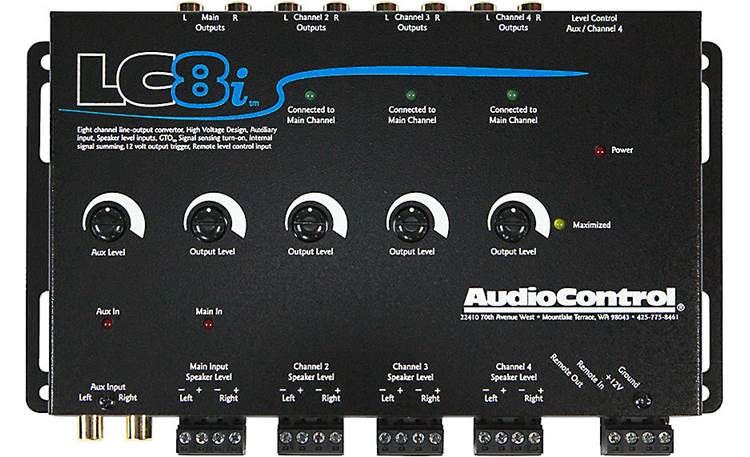
The line out converter I used is the AudioControl LC8i. I wanted this one because it allows for channel summing, and it also has quite a good remote out feature, which I wanted.
Kicker Amps
I needed more amps, however, for all the channels, so I bought a couple more amps: a subwoofer amp (Kicker 800.1 Class D), and a 4-channel amp (Kicker 360.4 Class AB). The advantage of these amps is that you can feed in a high-level speaker signal up to 40V, completely eliminating the need for any line out converters. They also provide some nice bass boost functionality.
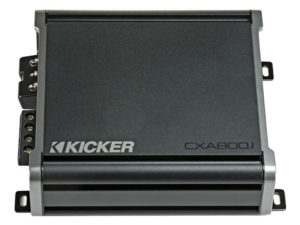
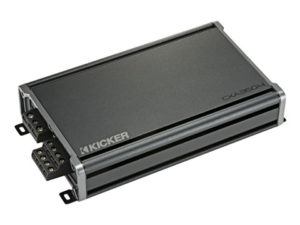
I prefer Class AB amps for the main speakers (less distortion), but Class D is fine for the subwoofers (more efficient).
Connectors
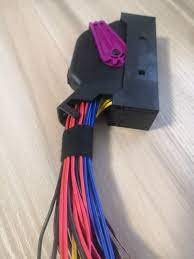
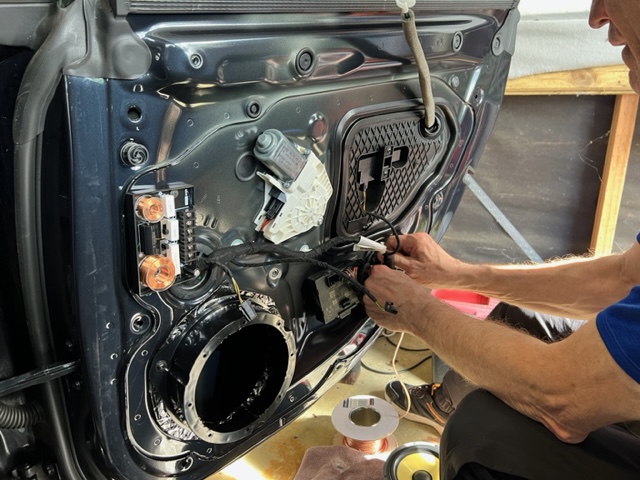
I really didn’t want to cut the factory wires if I could help it, so after much searching on Audi and VW forums, I came across a breakout board from a company in the UK called Mironics, which suited my purposes. Bruce was very helpful.

I also found the 38-pin plug on AliExpress.
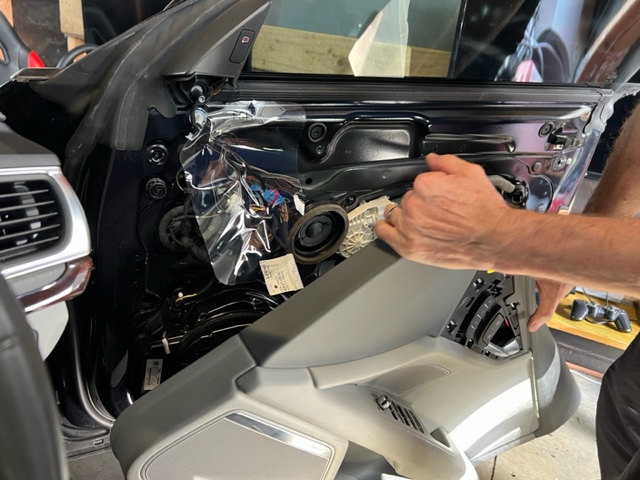
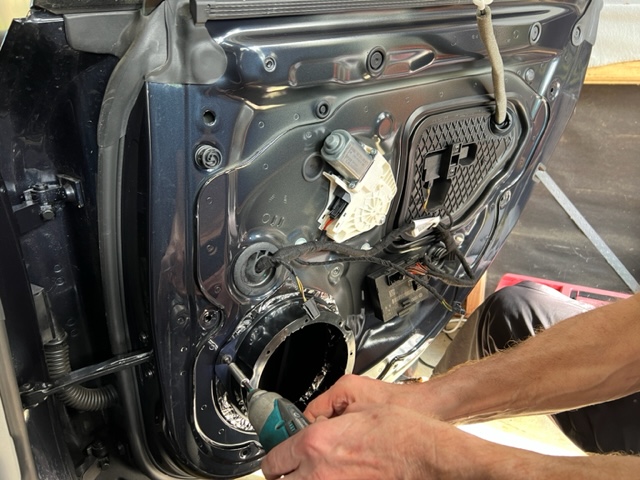
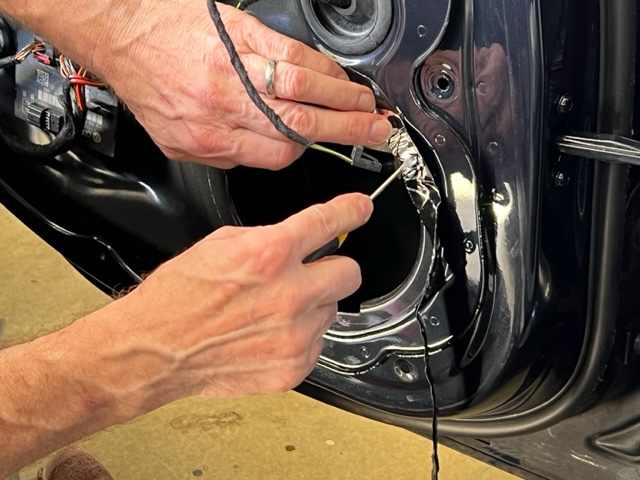
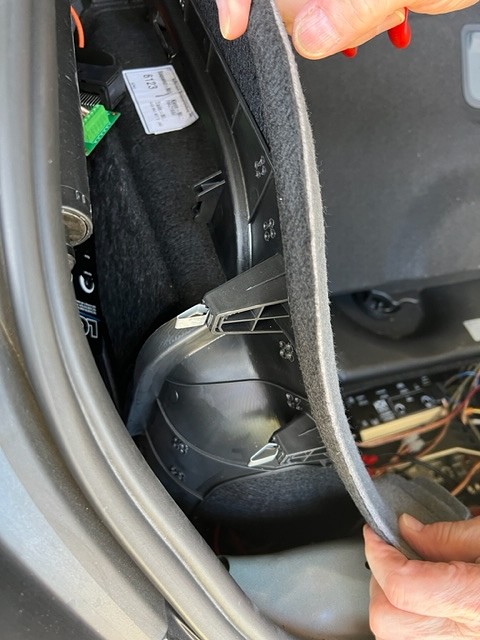
The Speaker Installation
After chatting with the nice people at Driving Sound, they recommended a mobile installer called Lance to do the speaker install. I considered doing it myself, but decided that it really would be useful to have an experienced installer do the work—pulling off the panels looked a bit involved, especially for the rear pillars, and you need some specific tools.
As it turned out, Lance really knew his stuff, and during the install it became apparent that his years of experience were coming in handy. I’m glad I got him to do it. Little things like where to use Dynamat to create an effective seal and installing the passive crossovers near the hinge to reduce the amount of vibration when closing doors are stuff you only learn from doing lots of installs.
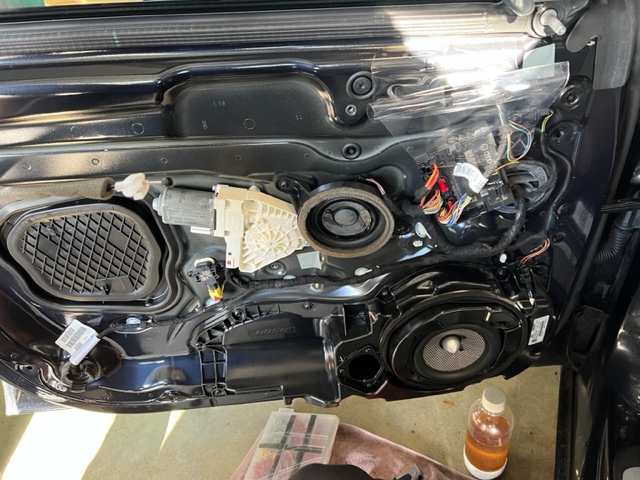

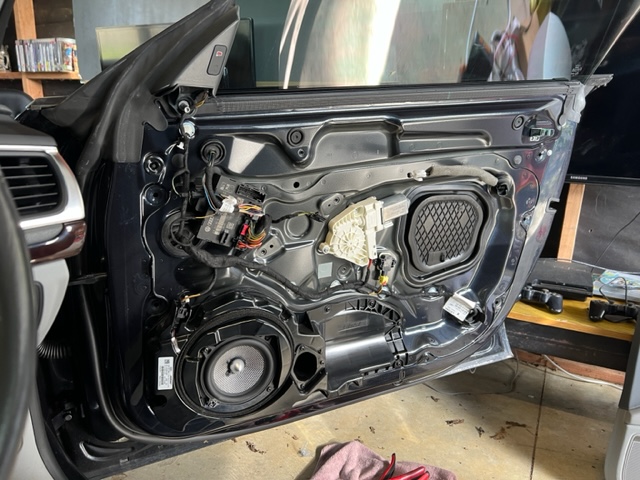
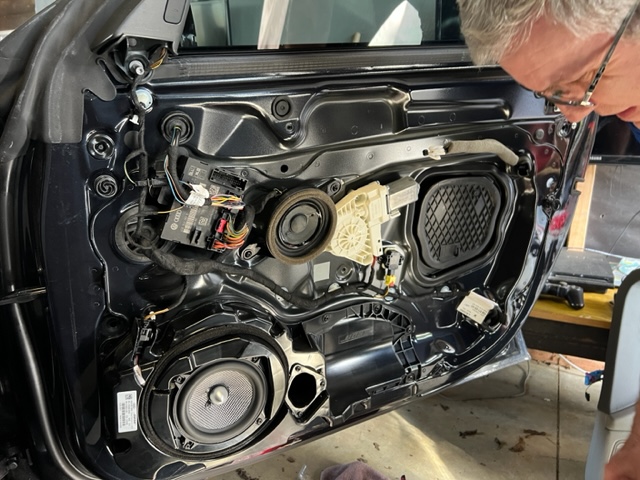
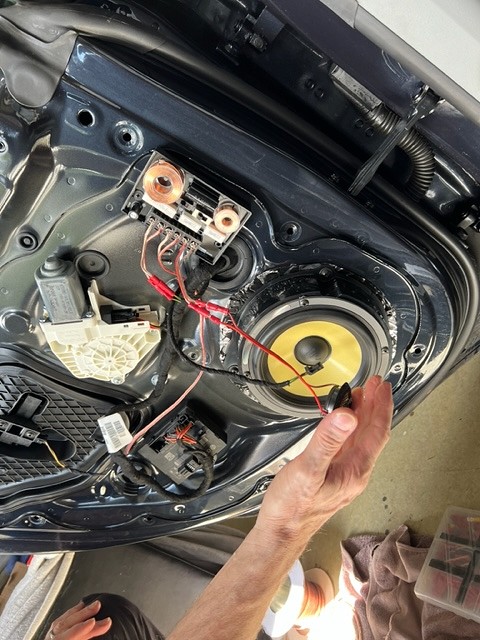

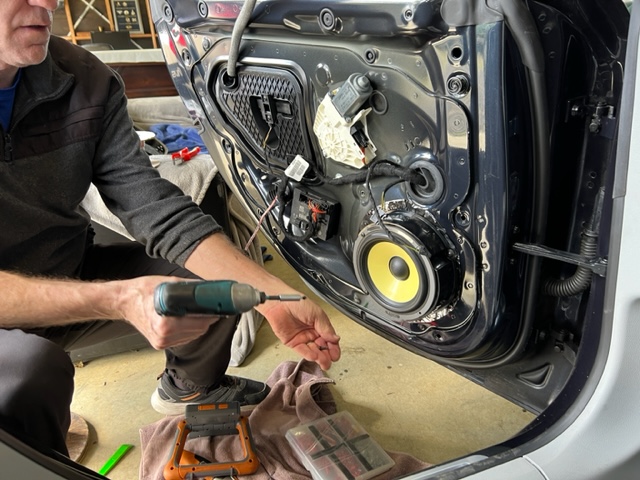
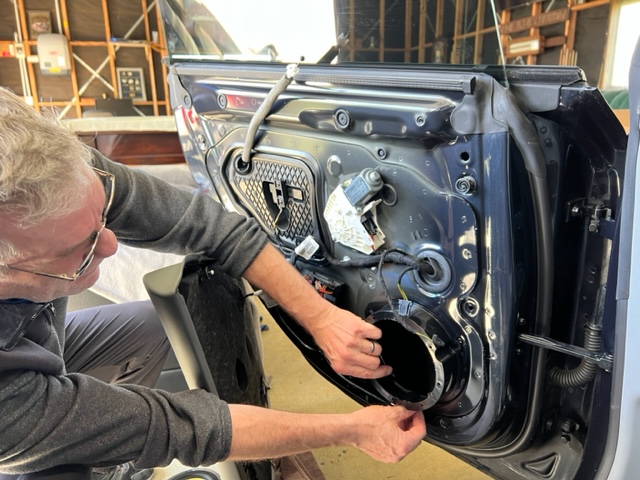
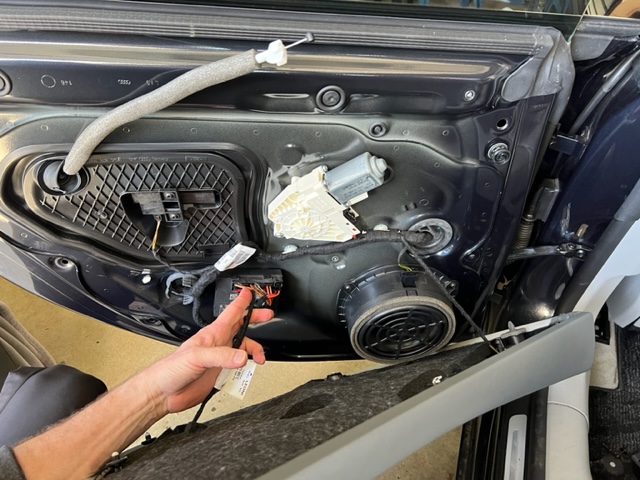
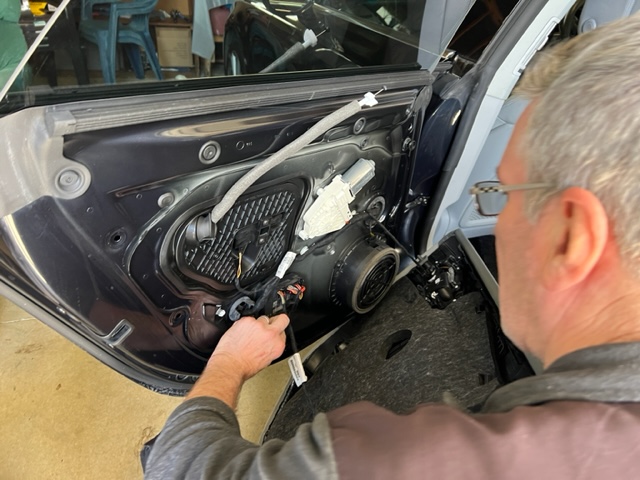
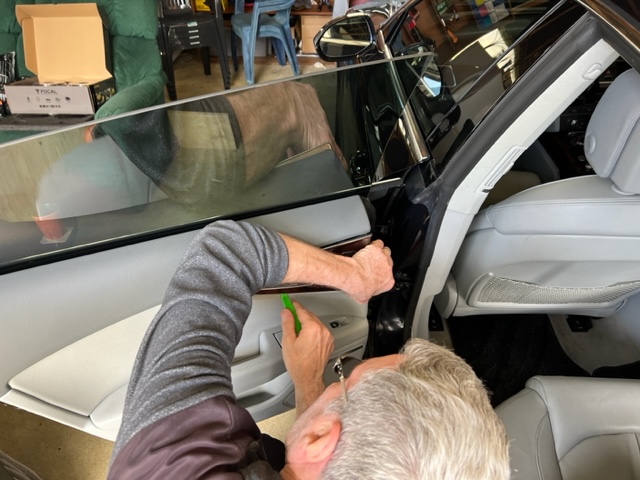
It took a full day of work to replace the nine speakers. I sorted out the coffees, and Sheryl did a pie run for lunch. The day seemed to go quickly. Lance was a nice guy and had great conversation. He showed me his car audio system, which was pretty impressive—he also had a McIntosh car amp (but his was factory fitted).
The Amps Wiring Design
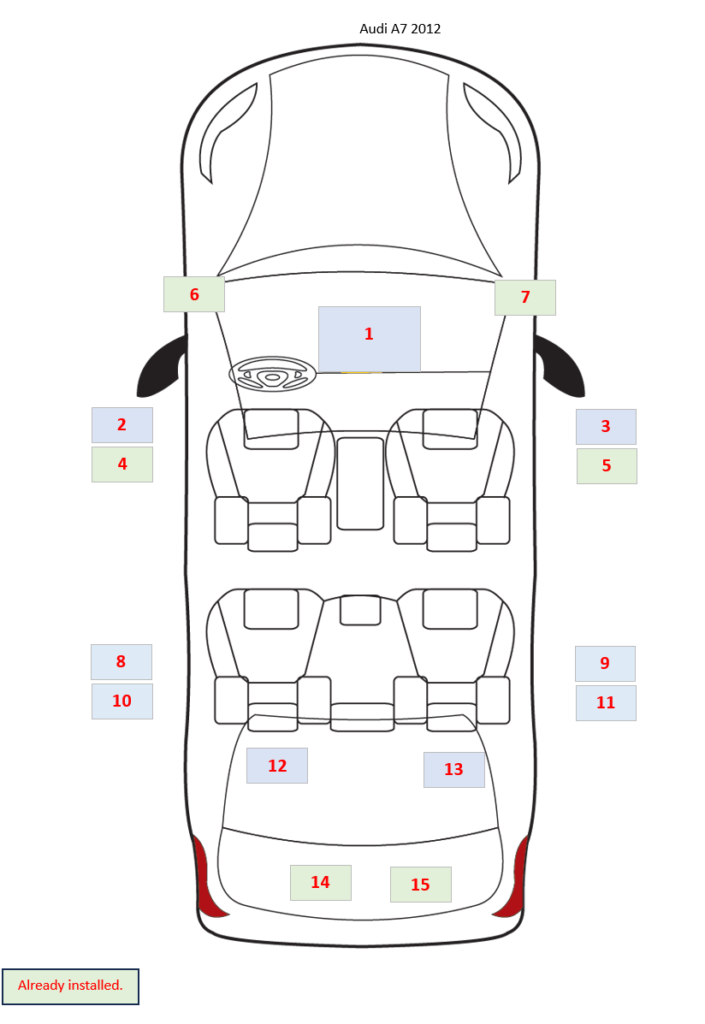
The Bose system has 12 outputs and 14 speakers (the speakers in the rear doors use passive crossovers; the rest are active from the Bose amplifier). I managed to find the pinout for the Bose amp, which allowed me to identify which pins to use for the amp outputs and speaker inputs.
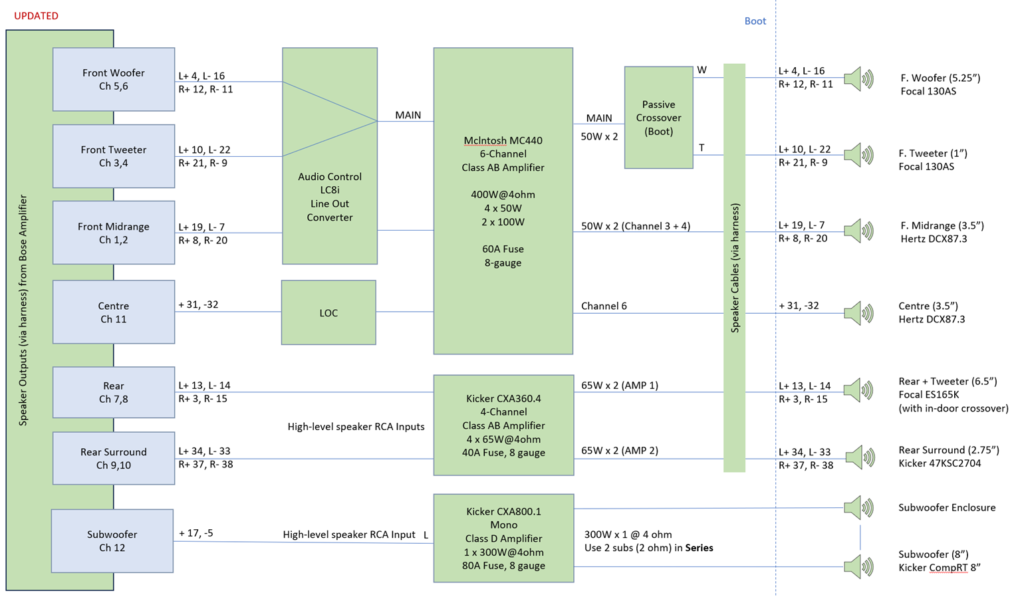
As you can see from the diagram, I avoided using channel 5 of the McIntosh amp.
The wiring for the power, ground, and remote:
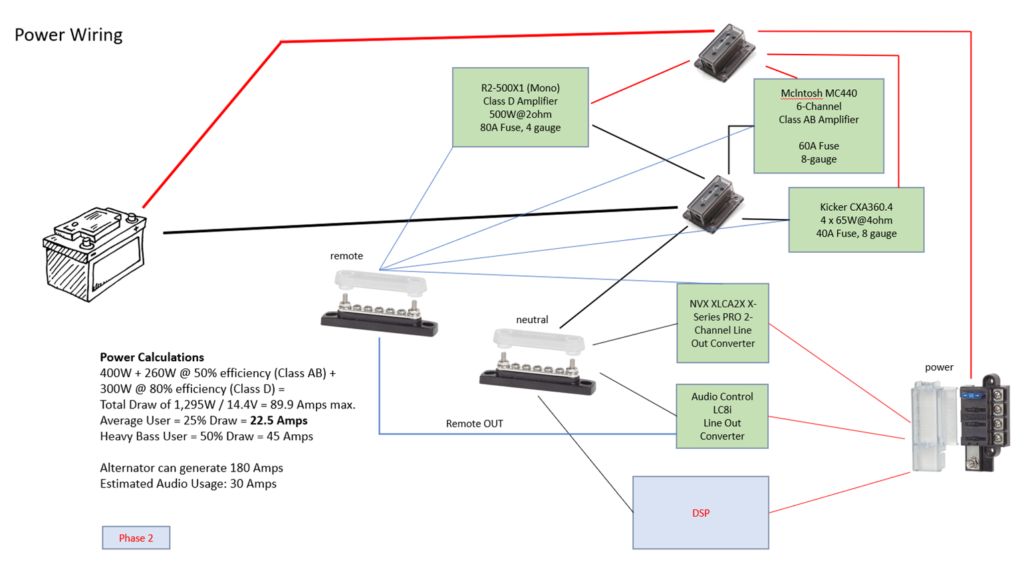
I designed the solution before I started doing any wiring, and I watched a lot of videos from the Car Audio Fabrication channel on YouTube.
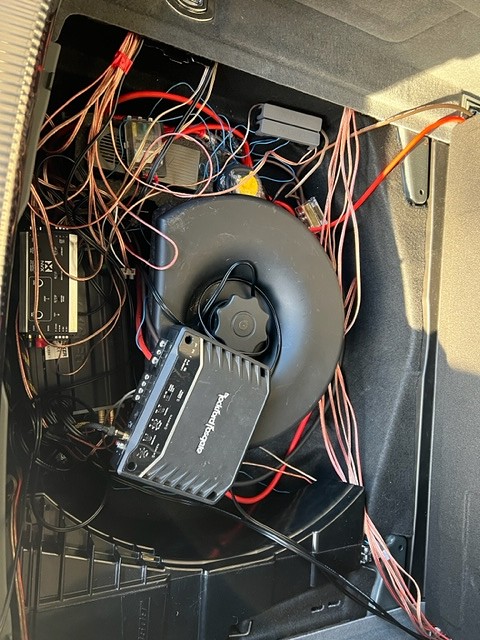
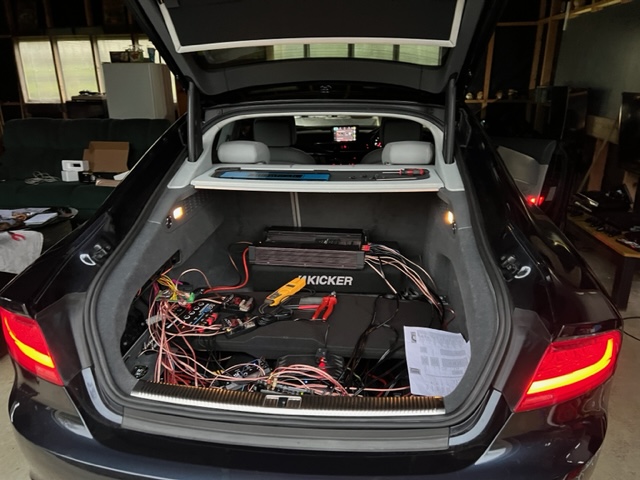
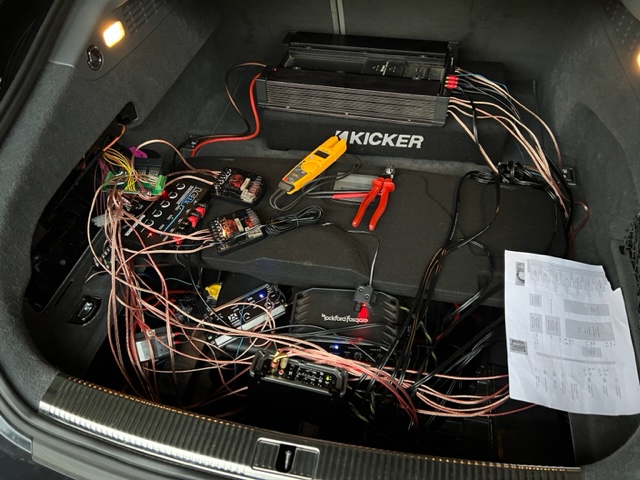
The Amp Install
I did this work myself. Upon reflection, it might have been better if I’d got a professional to do it, but I was trying to save some money and also learn from the experience. I made a few mistakes, but got there in the end.
Luckily, the battery and the amps are all located in the boot, which allowed for smaller cable runs. Initially, I thought I’d just wire it up and make sure it all worked correctly before making it tidy. This proved to be the right decision, as I changed the design a little bit as things went along, but it does make for a more time-consuming build.
Issues
I had a few issues. I bought a cheap line output converter from Repco as I kept hearing a hiss from channel 4 on the AudioControl LC8i. I failed to notice that the gain was turned up full, and when I connected it to my original subwoofer amp (a Rockford Fosgate R2500X1) that I picked up on Trademe cheaply, it blew the amp! So I ended up buying a new Kicker amp—the 800.1 model—and a new LOC for the centre channel to the McIntosh, from Driving Sound, which worked perfectly. It was pretty annoying at the time, and I was pretty upset with myself, but these things happen. It could have been a fault with the LOC.
Also, initially I was using a channel on the 4-channel Kicker amp for the centre speaker, but upon discovering the issues with channel 5—which I think is due to the terminal itself, as it’s missing a set screw—I switched to using the McIntosh amp for the centre channel. This wasn’t so much an issue, but a workaround, though I thought I’d mention it all the same.
I’ve tidied up some parts of the wiring, but it needs more work.
I nearly flattened the car battery with all the testing!
I was pretty rubbish at soldering RCA plugs (for the Kicker amps)—it uses the same RCA for high and low-level inputs with a switch to select. After a number of attempts (I got better with each one!), I managed to get some nice, robust connections.
The worst issue…
The lever snapped off the factory plug—the little plastic stubs that the hinge swivels on snapped off. I don’t really know how this happened; I was trying to be gentle. I’m pretty annoyed because I can’t get it off! I guess I’m committed to aftermarket amps now!!
The Result
The sound is a huge improvement! The bass is really there—getting the levels right was a bit of a mission. I tuned it as best as I could. The volume is much better, and I can pick out a lot more detail in the music now.
You can really tell the improvement that comes from using quality speakers and the addition of more power via the aftermarket amps.
What’s Next?
The rear speakers don’t give as much mid and bass as I would expect. I believe this is because the stock Bose amp is outputting specific frequency bands to the speakers, so there isn’t much I can do about that until I replace the Bose amp with the MoBridge DSP in the next phase. This will allow me to set equalization curves for each channel.
I also want to get the miniDSP UMIK-1 calibrated USB measurement microphone and use it with Room Eq Wizard (R.E.W.), so that I can properly test and measure the channel outputs and tune the audio system properly.
I’ll create a post about that stage in due course.
Exploring new worlds!
Kirk out.